 how-to
How to Improve Trap Set Location Efficiency
Table of Contents
- Scouting Terrain: Identifying Animal Sign in the Field
- Choosing Hunting Trapping Bait and Lure Placement
- Scent Management for Trappers: Reducing Human Odor at the Set
- Trap Stability, Bedding, and Concealment Techniques
- Seasonal Transitions: Adjusting Trap Set Location Throughout the Year
- Troubleshooting Failed Sets: Diagnosing Missed Catches
- Frequently Asked Questions
Last Updated: September 21, 2026
Scouting Terrain: Identifying Animal Sign in the Field
Improving trap set location efficiency starts with reading the ground before you set a trap. Improving trap set location efficiency starts with reading the ground before you set a trap.
Reading Tracks, Scat, and Trails
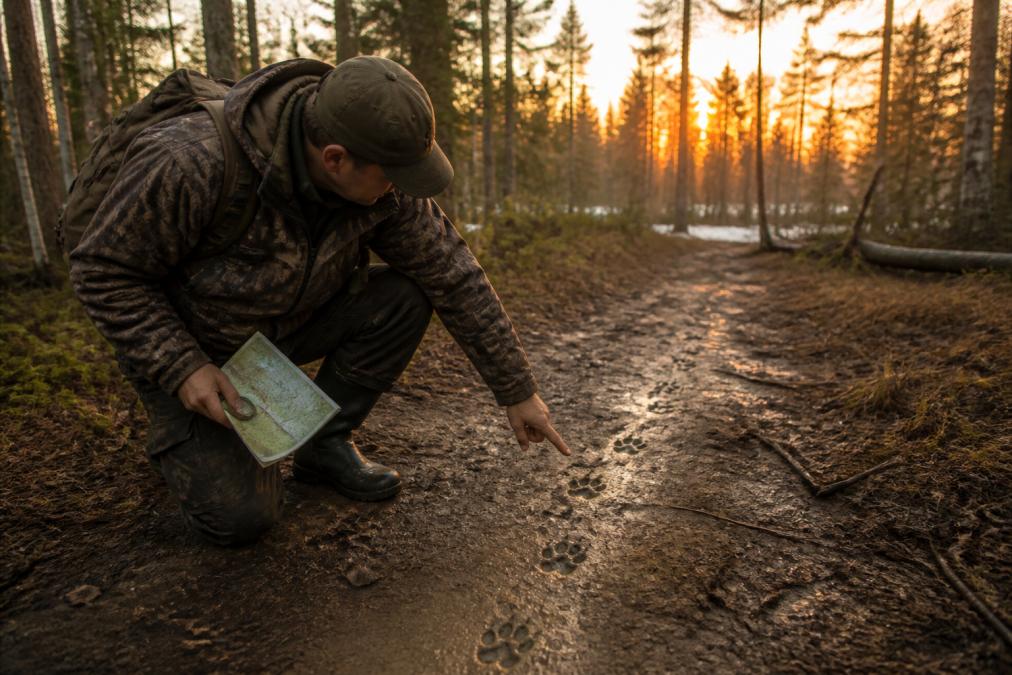
Fresh tracks tell you what moved through and when. Look for clear pad marks in mud, soft dirt, or snow; old tracks have rounded edges and debris inside.
Key sign to look for:
- Pinch points where two fence lines or tree rows narrow a path
- Travel corridors along creek banks, field edges, and ridge lines
- Scent post spots where animals repeatedly mark territory
- Beds and dens nearby, which confirm resident animals
Using Digital Maps to Pinpoint Travel Corridors
Digital mapping tools let you study terrain before you walk it. Satellite and topo layers show funnels, water crossings, and cover edges animals favor.
Choosing Hunting Trapping Bait and Lure Placement
Bait and lure do different jobs, and confusing them is why many sets pull animals in but never get a clean strike. Bait is a food reward that holds an animal at the set; lure is a scent cue, food, gland, or curiosity, that pulls one in from a distance. Place them by function, not habit.
Placement Geometry: Where Bait and Lure Actually Go
The rule across species: bait goes where the animal must commit, lure goes where the wind can carry it.
- Bait sits at the back of the set, behind the trap pan and past the jaws. The animal has to step over or onto the pan to reach it. If bait is reachable from the side, the animal will circle it and never touch the trigger.
- Lure goes above the set, a branch, weed stalk, or tuft roughly 12 to 24 inches off the ground, depending on target height. Scent rises and drifts; a lure at nose level pulls animals in from farther out than bait alone.
- Call lures (gland, urine, curiosity) belong at the set or on a nearby backing. Food lures work best on the approach, drawing the animal along the travel corridor toward the set.
Matching Bait and Lure to Target Species
Match the cue to what the animal eats and does locally. A bait that produces in one region can flop 100 miles away because the local diet differs.
- Coyote and fox: meat-based baits (beaver, muskrat, deer trim) with gland or urine lures. Canines are cautious; a strong food lure plus subtle gland scent at a scent post often beats a heavy bait pile.
- Raccoon: fish, shellfish, and sweet baits, sardines, fish oil, fruit pastes. Raccoons work sets with their hands, so a bait they can grab and pull rewards a firm bed and sensitive pan.
- Mink and otter: fish and shellfish baits plus gland lures at water-edge sets. These animals run water edges, so placement along a bank run beats bait in open water.
- Beaver: castor-based lures and fresh poplar or aspen cuttings. Beaver respond to castor as a territorial cue, not just food.
- Skunk and opossum: sweet and meat baits both work; these opportunistic feeders care more about travel-corridor location than bait choice.
Bait vs. Lure Trade-offs
- Bait-only sets hold animals longer but attract non-targets and scavengers, and weather changes the cue within days.
- Lure-only sets are cleaner and less attractive to non-targets, but rely on the animal being close enough to catch the scent. Best at pinch points and scent posts where animals already pass.
- Bait plus lure is standard for canines and raccoon: lure pulls from distance, bait holds at the set.
Common Bait and Lure Mistakes
- Burying bait so deep the animal digs around the trap instead of over it.
- Placing lure downwind so the animal approaches from the wrong side.
- Using the same bait and lure at every set, training local animals to associate the smell with danger.
- Handling bait and lure with bare hands, contaminating the cue with human odor.
- Over-baiting, which draws non-targets and predators that raid the set first.
Keep a simple log of bait, lure, weather, and result for each set. Over a season, that log tells you which combinations produce in your area, far more useful than any general recommendation.
Scent Management for Trappers: Reducing Human Odor at the Set
Scent management for trappers means keeping human odor away from the set. Animals detect what you leave behind long before they see the trap. One careless touch can kill a location for weeks.
- Boil or air traps to remove factory oils and handling scent
- Use clean, dedicated gloves for every set
- Keep boots off the trap bed and approach path
- Store lures and baits sealed and separate from gear
Trap Stability, Bedding, and Concealment Techniques
A trap that rocks, sits high, or freezes into its bed will misfire, warn the animal, or fail to hold. Bedding is the mechanical foundation of every set, and it changes with soil type, temperature, and target species.
Bedding the Trap: Step by Step
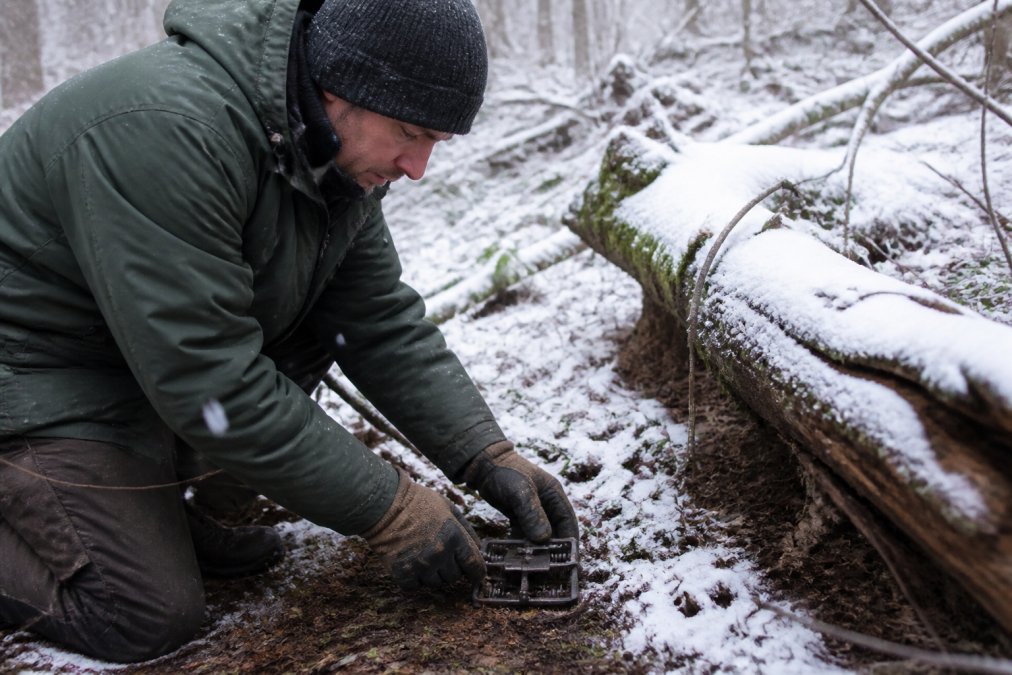
- Cut the bed. Dig a bed slightly larger than the trap's footprint and deep enough that the jaws sit level with, or a hair below, the surrounding ground. A trap sitting proud of the surface warns every animal that passes.
- Seat the trap. Pack fine, sifted dirt under the pan and around the jaws. The pan should sit level and the trap should not rock when you press the corners.
- Check pan tension. Match tension to the target. Too light and non-targets, debris, or rain trip the trap; too heavy and a light-stepping animal walks off without firing it. Adjust the screw or dog until a firm, deliberate press fires it.
- Verify the swivel and chain. The swivel must move freely so the animal can't twist the chain and work the trap loose. Check chain length and anchor point before covering.
- Anchor. Use a stake or cable rated for the target species. A short stake in soft soil will pull; a long stake in hard, dry soil may not seat. Cable anchors with a shock spring reduce pull-outs on strong animals.
- Conceal. Cover the trap with sifted local material, dirt, leaves, grass, or duff matching the surroundings, so no clumps or human disturbance show, and blend the bed edges into the surrounding ground.
How Soil and Weather Change Bedding
- Sandy or loose soil: bed walls collapse easily. Line the bed with packed soil or a trap bed liner, and pack firmly in stages.
- Hard, dry clay: digging is slow and the bed can crack. Wet the soil slightly before bedding so it packs, then let it set.
- Frozen ground: pre-dig beds before the freeze, or use a waxed-dirt or peat-moss bed that won't freeze solid. A trap frozen into its bed won't fire.
- Wet, muddy ground: water pools and freezes around the trap. Raise the bed slightly or add drainage so the pan doesn't ice over.
Concealment That Survives Weather
Concealment is also about not disturbing the ground the animal will step on:
- Use sifted material matching local color and texture; imported dirt or bright leaves stand out.
- Cover the trap lightly, a heavy cover changes pan tension and can cause misses.
- Blend the bed edges so no ring of disturbed soil shows.
- Re-check after rain, snow, or wind; a set that looked perfect on day one can be exposed by day three.
| Step | What to Do | Why It Matters |
|---|---|---|
| Dig bed | Cut a bed slightly larger than the trap | Prevents rocking and misfires |
| Seat trap | Pack sifted dirt under pan and jaws | Keeps the trap level and firm |
| Set pan tension | Match tension to target species | Prevents non-target trips and misses |
| Check swivel | Confirm the swivel moves freely | Stops the animal twisting free |
| Anchor | Stake or cable rated for the species | Holds strong pulls |
| Conceal | Cover with sifted local material | Hides human disturbance |
Diagnosing Bedding and Stability Failures
When a set fails, the evidence usually points to a mechanical problem:
- Trap moved off the bed: poor bedding or weak anchor. Re-bed and re-anchor.
- Sprung but empty: pan tension too light, or the animal tripped the pan from the side. Adjust tension and re-check placement geometry.
- Trap frozen in place: the bed held water or the cover froze. Switch to a freeze-resistant bed material.
- Animal pulled free: swivel seized, chain too short, or anchor too weak. Check the swivel and upgrade the anchor.
- Repeated misses: the pan sits too deep or too shallow for the animal's step. Adjust bed depth so the pan sits at the natural step level.
Equipment Maintenance Tied to Stability
Stability is not just the bed. Traps that sit in the ground for weeks collect rust, dirt, and ice. Check each trap for:
- Free-moving jaws and a clean pan surface
- A swivel that turns without resistance
- A chain and anchor free of weak links or corrosion
- Pan tension that still matches the target after repeated use
Seasonal Transitions: Adjusting Trap Set Location Throughout the Year
Seasonal transitions force you to move sets as food, cover, and weather change. A location that produced in early fall may be dead by midwinter. Animals shift with food sources and snow depth.
- Track food shifts, such as crop harvest or berry die-off
- Follow the snow line as it moves downslope
- Reset pinch points that stay open when others fill with snow
- Watch for mechanical failure in traps exposed to freezing and thawing
Troubleshooting Failed Sets: Diagnosing Missed Catches
Troubleshooting failed sets means reading the evidence at the site instead of guessing. A sprung trap, dug-out bed, or untouched bait each points to a different problem. Check the set before blaming the location, tracks, disturbed dirt, and hair each narrow the cause.
Common problems and fixes:
- Sprung but empty trap: adjust trigger sensitivity or offset distance
- Dug-out set: the animal smelled you, so improve scent control
- Untouched bait: wrong bait or lure for the species
- Trap moved off the bed: poor bedding or weak anchoring
- Repeated misses: the trap pan sits too deep or too shallow
Frequently Asked Questions
What environmental factors influence trap set success?
Wind direction, soil moisture, temperature swings, and ground cover all affect how animals approach a set. A trap set location that works in dry, calm conditions may fail after heavy rain or a hard freeze. Check soil drainage before bedding a trap, and reposition sets when prevailing winds shift. In wet conditions, use waxed dirt or peat moss to keep the trap pan functioning properly. Monitoring weather patterns for 24 to 48 hours before setting gives you a clearer picture of how the site will perform.
How does scent control impact trap location efficiency?
Coyotes, foxes, and other furbearers have noses far more sensitive than humans. Human scent left on trap hardware, gloves, or nearby vegetation signals danger and causes animals to avoid the area. Wear clean gloves when handling traps, store them in scent-free containers, and avoid walking directly on travel corridors. Scent management for trappers also means using lures and baits that mask human odor while drawing animals toward the set. A well-placed trap loses its value if the approach path is contaminated.
How do you identify high-traffic animal corridors?
Look for pinch points where terrain naturally funnels movement: fence lines, creek crossings, ridge saddles, and field edges. Fresh tracks, scat, and worn trails confirm regular use. Digital mapping tools can help you overlay topography and vegetation data to predict where animals travel without scouting every acre on foot. Identifying animal sign in the field, then confirming it with map analysis, narrows your trap set location options to spots with the highest daily traffic.
What are the most common mistakes in trap placement?
Setting too close to a trail junction, failing to bed the trap level, and ignoring wind direction top the list. A trap pan that rocks or sits above the soil surface will trigger before the animal commits its weight. Placing sets where non-target species frequent the area wastes time and raises ethical concerns. Another frequent error is leaving a set unchanged after two or three nights without activity. Move the trap 10 to 15 feet along the corridor or switch bait before abandoning the site entirely.
Trapping rewards patience and precision, and the right gear makes both easier. At Campbell Fine Furs, we carry Western lures made with Andy Weiser's formulas, built for trappers who care about how well a set works in the field. Our artisanal fur accessories and home goods round out the same commitment to traditional craftsmanship. Browse the full lineup and see what fits your season. Get started with Campbell Fine Furs and gear up with lures and fur goods made to last.